

Introduction:
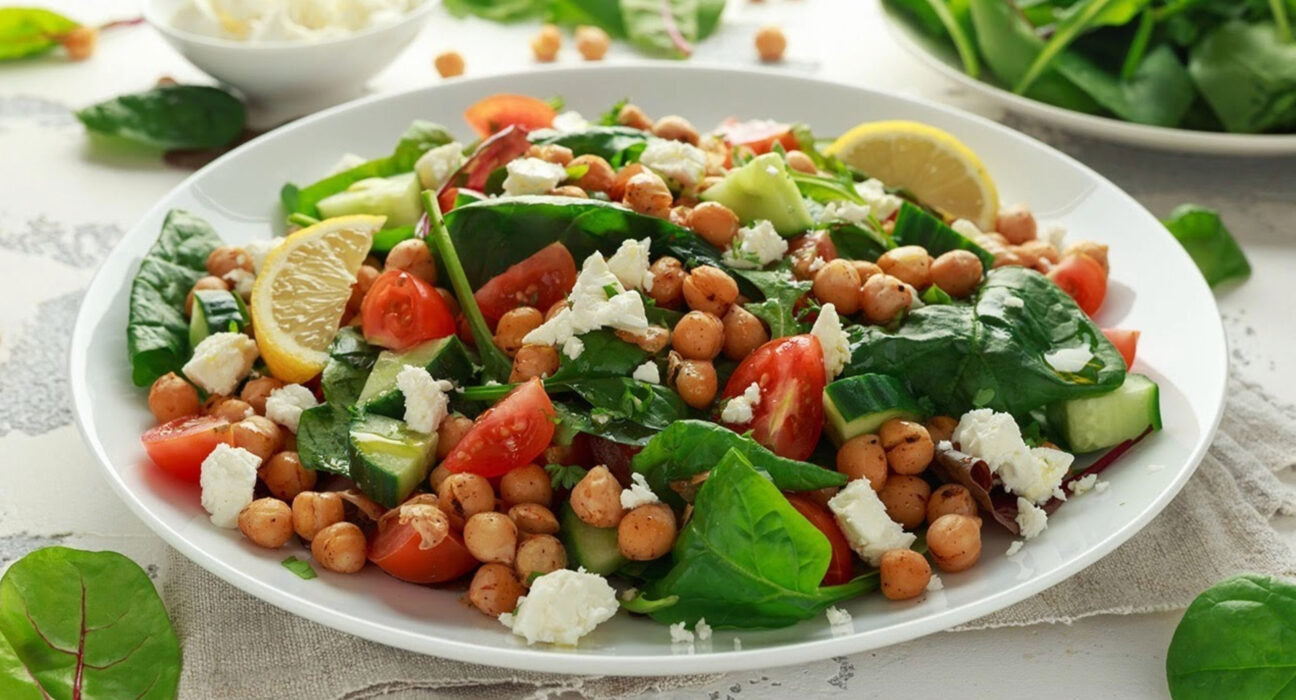
Nothing beats a light and refreshing salad to quench your hunger and tempt your taste buds as the days get longer and the temperatures rise. Here’s the Chickpea Tomato Salad with Feta, a colorful, nutrient-dense dish that highlights summer’s abundance of produce. This blog post will go over the easy yet delicious recipe for this salad, which has the ideal balance of tart feta cheese, juicy tomatoes, chickpeas, and fresh herbs. Prepare to enjoy a more elegant summertime meal with this filling and tasty salad!
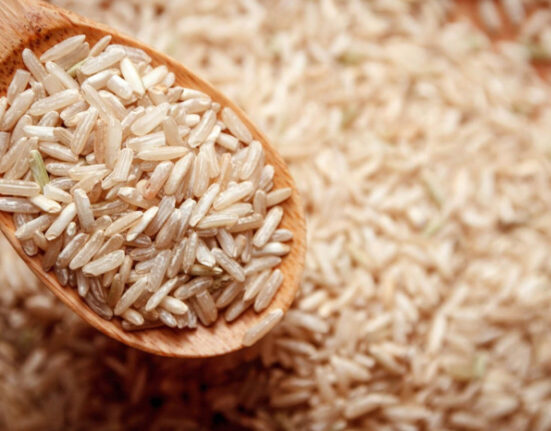
1. Prepare the Chickpeas
Canned Chickpeas: If you’re using canned chickpeas, start by draining the liquid from the can using a fine-mesh strainer or colander. Rinse the chickpeas thoroughly under cold running water to remove any excess salt and starch from the canning liquid. This step helps to reduce sodium content and improve the flavor and texture of the chickpeas.
Dried Chickpeas: If you prefer to use dried chickpeas, start by sorting through them to remove any debris or damaged beans. Rinse the dried chickpeas under cold water to remove any dirt or impurities. Then, soak the chickpeas in a large bowl of water overnight or for at least 8 hours. This soaking process helps to soften the chickpeas and reduce cooking time.
Cooking Dried Chickpeas: After soaking, drain the soaked chickpeas and transfer them to a large pot or pressure cooker. Cover the chickpeas with fresh water, ensuring that there’s at least a few inches of water above the chickpeas. Bring the water to a boil over medium-high heat, then reduce the heat to low and simmer the chickpeas for about 1 to 1 1/2 hours, or until they are tender. Alternatively, you can cook dried chickpeas in a pressure cooker according to the manufacturer’s instructions for faster cooking.
Draining and Rinsing: Once the chickpeas are cooked to your desired tenderness, drain them in a colander or fine-mesh strainer to remove excess water. Rinse the cooked chickpeas under cold running water to cool them down and stop the cooking process. This step also helps to remove any remaining starch and improve the texture of the chickpeas.
Storage: Whether you’re using canned or dried chickpeas, you can store any leftovers in an airtight container in the refrigerator for up to 3-4 days. Cooked chickpeas can also be frozen for longer-term storage. Simply transfer them to a freezer-safe container or bag and store them in the freezer for up to 3 months.
2. Chop the Vegetables and Herbs
- Cherry Tomatoes: Start by washing the cherry tomatoes under cold running water to remove any dirt or debris. Then, using a sharp knife, carefully slice each tomato in half lengthwise. If you prefer smaller pieces, you can further chop the halved tomatoes into quarters or smaller chunks. Add the chopped tomatoes to a large mixing bowl.
- Red Onion: Peel the outer skin of the red onion and trim off the root end. Cut the onion in half from root to tip, then place each half cut-side down on the cutting board. Thinly slice the onion halves crosswise into half-moon shapes. If you prefer smaller pieces, you can finely dice the sliced onions. Add the sliced or diced red onion to the mixing bowl with the cherry tomatoes.
- Fresh Parsley and Basil: Rinse the fresh parsley and basil under cold water to remove any dirt or grit. Shake off any excess water and pat the herbs dry with paper towels. Separate the parsley leaves and basil leaves from the stems. Gather the leaves into a tight bundle and hold them together with your fingers. Use a sharp knife to chop the herbs finely, rocking the knife back and forth in a rocking motion until the herbs are evenly chopped. Add the chopped parsley and basil to the mixing bowl with the cherry tomatoes and red onion.
- Mixing Bowl: Once all the vegetables and herbs are chopped, place them all in a large mixing bowl. This bowl will serve as the base for your salad or dish, providing a colorful and flavorful combination of fresh ingredients.
3.Make the Dressing
- Extra Virgin Olive Oil: Start by measuring out the desired amount of extra virgin olive oil into a small bowl. Extra virgin olive oil adds richness and depth to the dressing while providing heart-healthy monounsaturated fats.
- Red Wine Vinegar: Add the red wine vinegar to the bowl with the olive oil. Red wine vinegar adds a tangy acidity to the dressing, balancing the flavors of the other ingredients.
- Minced Garlic: Mince fresh garlic cloves finely using a sharp knife or a garlic press. Add the minced garlic to the bowl with the olive oil and red wine vinegar. Garlic adds a pungent flavor and aromatic complexity to the dressing.
- Dijon Mustard: Spoon Dijon mustard into the bowl with the other ingredients. Dijon mustard acts as an emulsifier, helping to bind the oil and vinegar together while adding a subtle tanginess and depth of flavor to the dressing.
- Salt and Pepper: Season the dressing with salt and pepper to taste. Salt enhances the flavors of the other ingredients, while pepper adds a hint of warmth and spice.
- Whisk Together: Using a small whisk or fork, vigorously whisk the ingredients together until well combined. Continue whisking until the dressing is smooth and emulsified, with no visible separation between the oil and vinegar.
- Adjust Seasonings: Taste the dressing and adjust the seasoning if necessary. Add more salt, pepper, vinegar, or mustard according to your taste preferences.
- Serve or Store: Once the dressing is ready, it can be used immediately to dress your salad or dish. Alternatively, you can transfer the dressing to a small jar or container with a tight-fitting lid and store it in the refrigerator for later use. Just give it a good shake before serving to re-emulsify the ingredients.
4. Combine the Ingredients
- Add the Cooked Chickpeas: If you’re using canned chickpeas, make sure they’re thoroughly drained and rinsed under cold water. If you’ve cooked dried chickpeas, ensure they’re tender and drained. Add the chickpeas to the large mixing bowl containing the chopped vegetables and herbs.
- Pour the Dressing: Give the dressing a final whisk to ensure it’s well combined, then pour it over the salad ingredients in the bowl. The dressing will infuse the salad with its vibrant flavors, providing a perfect balance of acidity, richness, and tanginess.
- Toss Gently: Using salad tongs or a large spoon, gently toss the salad ingredients together to coat everything evenly with the dressing. Take care not to be too vigorous, as you want to avoid crushing or mashing the delicate chickpeas and vegetables.
- Ensure Even Coating: As you toss the salad, make sure that every chickpea, tomato, onion slice, and herb leaf gets coated with the dressing. This ensures that each bite is bursting with flavor and freshness.
- Adjust Consistency: If the salad seems a bit dry or you prefer a lighter coating of dressing, you can add a splash more olive oil or vinegar and toss again to incorporate.
- Check for Seasoning: Taste the salad and adjust the seasoning if necessary. You can add more salt, pepper, or any other herbs or spices to enhance the flavors to your liking.
- Serve Immediately: Once the salad is well tossed and seasoned to your preference, it’s ready to serve. Transfer the salad to a serving bowl or individual plates and garnish with additional fresh herbs if desired.
- Enjoy: Serve your chickpea salad immediately as a nutritious and satisfying meal or side dish. It pairs well with grilled meats, fish, or as a standalone vegetarian option. Enjoy the vibrant flavors and wholesome goodness of this simple yet delicious dish!
5. Add the Feta Cheese
- Crumble the Feta Cheese: Start by crumbling the feta cheese into small pieces. You can use your hands to break the cheese into chunks or use a fork to gently crumble it over the salad. Aim for bite-sized pieces of feta that will distribute evenly throughout the salad.
- Even Distribution: Once the feta cheese is crumbled, sprinkle it evenly over the top of the salad in the mixing bowl. The creamy texture and salty tang of the feta will complement the other ingredients in the salad, adding depth and richness to each bite.
- Toss Lightly: After adding the feta cheese, give the salad a final gentle toss to distribute the cheese evenly throughout. Be careful not to overmix, as you want to preserve the texture of the feta while ensuring it’s well incorporated into the salad.
- Coat with Dressing: As you toss the salad with the feta cheese, the creamy cheese will mingle with the dressing, creating a harmonious blend of flavors. The salty and tangy notes of the feta will complement the acidity of the dressing, resulting in a well-balanced and delicious salad.
- Serve and Enjoy: Once the feta cheese is evenly distributed throughout the salad, it’s ready to serve. Transfer the salad to a serving bowl or individual plates, and garnish with additional fresh herbs if desired. Serve immediately and enjoy the delightful combination of flavors and textures in every bite.
6. Chill and Let Flavors Marinate
- Cover and Refrigerate: Once the salad is fully assembled with the feta cheese incorporated, cover the salad bowl with plastic wrap or a fitted lid. This will help seal in the freshness and prevent any external odors from affecting the salad.
- Refrigerate for at Least 30 Minutes: Transfer the covered salad bowl to the refrigerator and allow it to chill for at least 30 minutes. During this time, the flavors of the vegetables, herbs, chickpeas, dressing, and feta cheese will have a chance to mingle and intensify.
- Allowing Time for Marination: Chilling the salad allows the acidic components of the dressing to penetrate the ingredients, enhancing their flavor and texture. The feta cheese will also benefit from some time to soften slightly and meld with the other ingredients, resulting in a more cohesive and flavorful salad.
- Enhanced Taste and Texture: As the salad rests in the refrigerator, the vegetables will soften slightly while still retaining their crunch, and the herbs will infuse their fresh flavors throughout the dish. The chickpeas will also absorb some of the dressing, becoming more flavorful and satisfying.
- Serve and Enjoy: After the chilling period, your chickpea salad will be ready to serve. Give it a final toss to redistribute the dressing and flavors, then transfer it to a serving bowl or individual plates. Garnish with additional fresh herbs or a sprinkle of feta cheese if desired, and enjoy the refreshing and delicious flavors of your chilled chickpea salad.
7. Savor the Freshness
Vibrant Colors: The salad is a feast for the eyes, boasting an array of vibrant hues that showcase the beauty of fresh, seasonal ingredients. The deep red of the cherry tomatoes, the earthy green of the parsley and basil, and the creamy white of the feta cheese create a visually stunning ensemble that’s as pleasing to behold as it is to eat.
Textural Delights: As you take your first forkful of salad, you’ll be met with a delightful medley of textures that add interest and dimension to each bite. The juicy burst of the cherry tomatoes contrasts with the creamy smoothness of the chickpeas, while the crumbled feta cheese provides a satisfyingly rich and velvety finish.
Flavorful Symphony: But it’s the flavors of this salad that truly steal the show, each ingredient contributing its own distinct personality to the ensemble. The sweetness of the ripe tomatoes bursts forth with each juicy bite, complemented by the subtle nuttiness of the chickpeas and the tangy bite of the feta cheese. Meanwhile, the fresh herbs infuse the salad with their aromatic essence, elevating the dish to new heights of culinary delight.
A Refreshing Experience: With its vibrant colors, tantalizing textures, and complex flavors, this refreshing summer salad offers a culinary experience like no other. Whether enjoyed as a light lunch, a side dish at a barbecue, or a refreshing snack on a hot summer’s day, this salad is sure to delight your taste buds and leave you craving more.


Conclusion:
The Chickpea Tomato Salad with Feta is the epitome of summer dining – simple, satisfying, and bursting with flavor. Whether enjoyed as a light lunch, a side dish at a barbecue, or a refreshing accompaniment to grilled meats or seafood, this salad is sure to become a staple in your summer recipe repertoire. With its vibrant colors, wholesome ingredients, and delightful taste, it’s a dish that embodies the essence of summer and celebrates the abundance of seasonal produce. So, gather your ingredients, whip up a batch of this delicious salad, and savor the taste of summer with every forkful!